

Table of Contents
- Why Light Leaks Disrupt Sleep and How to Spot Them
- Understanding Your Sleep Mask's Design: Nose Bridge and Contoured Eye Cups
- Step-by-Step: Adjusting Your Sleep Mask Nose Bridge for Zero Light Penetration
- Securing Strap Tension and Preventing Mask Displacement
- Best Sleep Mask Fit for Side Sleepers and Other Sleeping Positions
- Troubleshooting Common Sleep Mask Fit Issues
- DIY Modifications and CPAP Integration for Enhanced Light Blocking
- Conclusion: Achieving Your Darkest Sleep Environment
- Frequently Asked Questions
Last Updated: September 28, 2026
Why Light Leaks Disrupt Sleep and How to Spot Them
Light is the enemy of deep sleep. To prevent light leaks in sleep masks, even small amounts seeping into your mask must be blocked to avoid disrupting your circadian rhythm and pulling you out of restorative REM sleep stages. When light penetrates your sleep environment, your brain stays partially alert. You wake feeling unrested even after eight hours.
The problem compounds when you travel or sleep in bright rooms. A gap around the nose bridge, loose straps, or poor peripheral coverage all create light penetration pathways. Most people don't realize how much light leakage is happening until they fix it and experience the difference.
Spotting light leaks is straightforward. Lie down in a dark room wearing your mask. Open your eyes slightly. Can you see any light? Check around the nose area, temples, and cheekbones. Light visible at any point means your mask needs adjustment. Many side sleepers discover leaks when sleeping on their preferred side because the mask shifts.
Understanding Your Sleep Mask's Design: Nose Bridge and Contoured Eye Cups
Your sleep mask has three critical light-blocking features: the nose bridge, contoured eye cups, and the peripheral seal. Understanding how each works helps you adjust them correctly.
The nose bridge is the padded area that sits directly over your nose. This is where most light leaks begin. A contoured nose baffle blocks light from entering at the top of your nose. The design matters here. A flat bridge leaves gaps. A properly contoured padded nose bridge follows your facial anatomy and creates an occlusion that prevents light penetration.
Contoured eye cups are the 3D-shaped sections that surround your eyes. These aren't flat blindfolds. They're designed to allow blinking without pressure while creating a seal around your eye sockets. Memory foam eye cups adapt to your specific face shape, reducing pressure points and light gaps simultaneously.
The peripheral seal extends to your temples and cheekbones. This is where side sleepers often experience displacement issues. The mask edges must sit flush against your face without gaps. Loose edges here cause light leakage even when the nose bridge is perfect.
Keith Lambert Co.'s 3D Memory Foam Sleep Mask uses a contoured padded nose bridge specifically designed to eliminate light penetration at this critical junction. The memory foam eye cups conform to individual facial anatomy, and the adjustable strap system maintains consistent pressure without displacement.

Step-by-Step: Adjusting Your Sleep Mask Nose Bridge for Zero Light Penetration
To prevent light leaks in sleep masks, start with proper nose bridge adjustment. This is where most masks fail, and where you'll see the biggest improvement.
Step 1: Position the mask correctly on your face
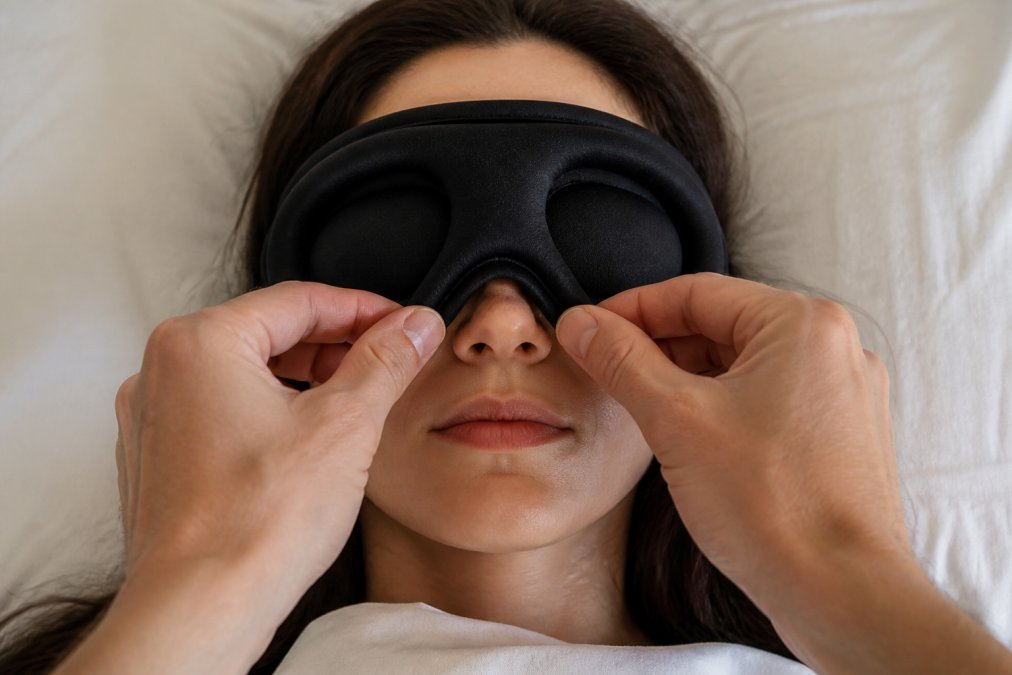
Place the mask on your face without fastening the strap. The nose bridge should sit directly over the bridge of your nose, not higher on your forehead or lower on your nostrils. The contoured eye cups should surround your eyes symmetrically. If the mask sits too high, it leaves a gap above your nose. Too low, and it presses uncomfortably on your nostrils.
Step 2: Adjust the strap for initial tension
Fasten the adjustable strap at a medium tension. Not tight enough to cause a pressure headache, but snug enough that the mask stays in place when you turn your head. The strap should pull the mask firmly against your face without distorting the nose baffle.
Step 3: Test for light penetration
Lie down and open your eyes slightly inside the mask. Look for any light around the nose bridge area. If you see light, the bridge isn't creating a proper seal. Tighten the strap incrementally and retest.
Step 4: Fine-tune the nose bridge position
If light still leaks through after tightening, the mask position may be off. Remove it and reposition slightly higher or lower. The contoured nose baffle needs direct contact with your nose bridge to block light effectively. Even a quarter-inch shift can eliminate gaps.
Step 5: Verify no pressure points
After achieving zero light penetration, wear the mask for 10 minutes. You should feel secure pressure but no sharp pain or throbbing. If you have a pressure headache, loosen the strap slightly and adjust the nose bridge position rather than reducing tension uniformly.
Securing Strap Tension and Preventing Mask Displacement
Strap tension controls whether your mask stays in place or shifts during sleep. Displacement is the second-biggest cause of light leaks after poor nose bridge fit.
Most people make the same mistake: they tighten the strap as much as possible. This creates pressure headaches and still doesn't prevent displacement. The solution isn't more tension. It's proper tension placement.
Your strap should pull the mask backward and slightly downward. This keeps the nose bridge pressed firmly against your nose while the eye cups maintain contact with your eye sockets. An extra-wide adjustable strap distributes pressure evenly, reducing the risk of displacement from localized pressure points.
3D Memory Foam Sleep Mask – 99.9% →
Side sleepers face unique displacement challenges. When you sleep on your side, gravity pulls the mask toward your pillow. A strap system with flat, flexible design resists this pull better than narrow straps. The adjustable buckles should allow fine-tuning without creating pressure spikes.
Check your strap tension every night for the first week. You'll quickly learn the sweet spot where the mask stays secure without causing discomfort. Most people find this is tighter than they initially expected but looser than they feared.
Best Sleep Mask Fit for Side Sleepers and Other Sleeping Positions
Side sleepers need different mask strategies than back sleepers. Your sleeping position determines where light leaks happen and how to prevent them.
For side sleepers: Displacement is your main enemy. When you sleep on your left side, your right cheekbone presses into the pillow, and the mask shifts toward your left. The temple coverage on your left side loses contact with your face, creating light leakage. Use an extra-wide adjustable strap that distributes pressure across your entire head rather than concentrating it on one area. Test your mask position while lying on your side before sleep, not just while sitting up.
For back sleepers: You'll experience more uniform pressure across the mask.
Troubleshooting Common Sleep Mask Fit Issues
Even with proper adjustment, fit problems emerge. These are the most common issues and how to fix them.
Light leaks around the nose bridge despite tight straps:
Pressure headaches after 30 minutes:
Mask slips during sleep even with tight straps:
Light leaks at the temples:
Discomfort on the bridge of your nose:
DIY Modifications and CPAP Integration for Enhanced Light Blocking
If standard adjustments don't eliminate light leaks, DIY modifications can help. These techniques work for most masks and require minimal materials.
Adding extra padding to the nose bridge:
Sealing temple gaps with fabric tape:
Reinforcing the strap attachment points:
CPAP integration challenges:
Conclusion: Achieving Your Darkest Sleep Environment
Light penetration destroys sleep quality. A single gap around your nose bridge or temples keeps your brain partially alert all night. The solution isn't complicated: proper positioning, correct strap tension, and a mask designed with a contoured padded nose bridge and 3D memory foam eye cups.
Frequently Asked Questions
Why does my sleep mask let light in around the nose?
Light leaks at the nose occur when the nose bridge isn't properly positioned against your facial contours. The bridge of the nose is the highest point on your face, and gaps here are common because of individual facial anatomy variations. Ensure your mask's padded nose baffle sits flush against your nose bridge without gaps. Check that your strap tension is even on both sides, unequal tension displaces the mask, creating peripheral light leakage. A contoured design with a padded nose bridge, like the 3D Memory Foam Sleep Mask, is engineered to block light from every angle, even in bright rooms.
How should a sleep mask fit to prevent light leaks?
A properly fitted sleep mask should create a complete facial seal with zero gaps around the eyes, nose bridge, and temples. The mask should sit snugly but comfortably, tight enough that you cannot see any light when your eyes are closed, but not so tight that it causes pressure points or headaches. The nose bridge should be flush against your skin, the eye cups should contour naturally without pressing on your eyelids, and the adjustable strap should be even on both sides. Test the fit by turning toward a light source; if you see any glow, reposition the mask or tighten the strap incrementally.
Are 3D memory foam masks better at preventing light leaks than flat designs?
Yes. Contoured 3D memory foam designs conform to your facial anatomy more effectively than flat masks, creating a better seal around the nose, cheekbones, and eye sockets. The padded nose bridge on a 3D mask is specifically engineered to block light penetration at the point where most light leaks occur. Memory foam also adapts to pressure points, reducing the need for excessive strap tension that can cause discomfort. This design allows you to achieve 99.9% blackout without the pressure headaches that flat masks often cause.
Can I modify my current sleep mask to block more light?
Yes. Common DIY modifications include adding adhesive-backed foam strips or medical tape along the nose bridge and temple areas to fill gaps, replacing the original strap with a wider, flatter adjustable band to reduce displacement, and applying a light fabric or fleece to the eye cup interior to increase light-blocking density. However, modifications work best as temporary fixes. If your mask consistently lets light in despite adjustments, upgrading to a mask with a contoured nose bridge and memory foam construction will provide better long-term light-blocking performance and comfort.